Neural Networks 101: Part 10 - FastAI Tips
Practical FastAI Tips
This blog post will go through in more detail, practical tips for preprocessing and training using FastAI.
This post will go through step by step:
- Gathering training data
- Preprocessing
- Training
In each step, FastAI classes and functions will be introduced and described in detail.
MNIST Example
This example will use the MNIST dataset to demonstrate and explain in detail the classes and functions of FastAI.
path = untar_data(URLs.MNIST)
path.ls()
DataBlock
The DataBlock is a fundamental class in FastAI. It serves as a wrapper that defines a data processing pipeline for training a model.
The class defines:
- How to retrieve the independent variables (training input)
- How to retrieve the dependent variables (the labels for the input)
- How to create “blocks”. Blocks define the data types for the dependent and independent variables. FastAI will transform the input and label data into these category blocks
- How to split the data into training and validation sets
- How to transform and normalize the input data
- How to augment the training data
data_block = DataBlock(
    blocks=(ImageBlock, CategoryBlock),
    get_items=get_image_files,
    splitter=RandomSplitter(seed=42, valid_pct=0.2),
    get_y=parent_label,
    item_tfms=Resize(224),
    batch_tfms=aug_transforms
)

data_loaders = data_block.dataloaders((path/'training'))
-
blocks- Defines the training inputs. Since our training data consists of images and labels, we declare them asblocks=(ImageBlock, CategoryBlock) -
get_items- Defines how we retrieve the input data, which in this case are image files -
splitter- Defines how we split the input into training and validation sets. Here, we randomly split the data using seed 42 and assign 20% as the validation set- It’s useful to use a seed when randomly splitting because it ensures reproducibility if we need to return to make adjustments with the same randomized set
-
get_y- Defines how we retrieve our dependent variables, using the FastAIparent_labelfunction, which uses the name of the folder as the label for the variables -
item_tfms- Defines how we normalize the input data. Here, we resize the images to 224x224 pixels. Uniformity for all training inputs, especially image inputs, is crucial for accurate training -
batch_tfms- Defines the transformations applied when the data is batched. In this case, we use the defaultaug_transformsfunction in FastAI- This function applies ‘default’ augmentations to images, such as zooming, flipping, and rotating. This increases the size of our dataset, allowing the model to generalize better over the data
-
data_block.dataloaders((path/'training'))- Transforms theDataBlockand training data intoDataLoadersafter creating aDatasetobject"
Types of DataBlocks
There are many different types that can be used to define the independent and dependent variables.
ImageBlock- input data for imagesCategoryBlock- categorical labels for the dependent variablesMultiCategoryBlock- for multi label dependent variables, usually used with one-hot encodingRegressionBlock- used for numerical targets with a range, suitable for regression tasksTextBlock- used in Natural Language Processing models where the independent variable is text
These are a few of the available category blocks, you can also create your own custom block through inheriting TransformBlock and implementing encodes() and decodes().
Datasets
Datasets is a class that contains the fetched, split and normalized training data as independent and dependent variables. It’s the next step from transforming the DataBlock towards organized and trainable data.
The code below is taken from DataBlock class. It has the method dataloaders(), which first transforms the data into a Dataset.
  def datasets(self,
        source, # The data source
        verbose:bool=False, # Show verbose messages
    ) -> Datasets:
        self.source = source                     ; pv(f"Collecting items from {source}", verbose)
        items = (self.get_items or noop)(source) ; pv(f"Found {len(items)} items", verbose)
        splits = (self.splitter or RandomSplitter())(items)
        pv(f"{len(splits)} datasets of sizes {','.join([str(len(s)) for s in splits])}", verbose)
        return Datasets(items, tfms=self._combine_type_tfms(), splits=splits, dl_type=self.dl_type, n_inp=self.n_inp, verbose=verbose)

    def dataloaders(self,
        source, # The data source
        path:str='.', # Data source and default `Learner` path
        verbose:bool=False, # Show verbose messages
        **kwargs
    ) -> DataLoaders:
        dsets = self.datasets(source, verbose=verbose)
        kwargs = {**self.dls_kwargs, **kwargs, 'verbose': verbose}
        return dsets.dataloaders(path=path, after_item=self.item_tfms, after_batch=self.batch_tfms, **kwargs)
-
We can seee that when we convert the
DataBlockto aDataLoaders, we call thedataloaders()method which creates an intermediaryDatasets -
datasets()first callsself.get_itemsusing thesource, which was defined in theDataBlockasget_image_files(). This will fetch all the training data -
splits- Uses the splitter defined inDataBlockto split the items into training and validation. This contains the indexes for the split data. -
The
Datasetsobject is returned with the items (the transformations are NOT yet applied) and the split data indexes. -
The transformations are lazy loaded/applied when items in the
Datasetsare accessed. This is a memory efficient strategy since data sets can be very large and transformations are only applied when required.
DataLoaders
DataLoaders is a wrapper that contains a list of DataLoader objects. This represents a collection of batched training data, ready for normalization, augmentation and loading into the GPU for training.
Like the Datasets, the augmentation and normalization is lazy loaded when the batch is called on for training.
Show Batch
In the example so far, we’ve downloaded training data. Defined the data processing pipeline using DataBlock and converted the training data to a Dataset -> DataLoaders.
The training data is ready to be given to a Model for training. But there’s a useful method to view our training data visually.
data_loaders.show_batch(max_n=9, figsize=(8, 8))
One Batch
This method retrieves one batch. It’s useful when you would need to train on a single batch and view the results. This returns the training input (x variable) and the labels (y variable).
x,y = data_loaders.one_batch()
Number of classes
A useful class variable, returns the number of classes (labels).
data_loaders.c
>>> 10
Vocabulary
A class variable that contains the name of all the labels.
vocab = data_loaders.vocab
>>> ['0', '1', '2', '3', '4', '5', '6', '7', '8', '9']
train and valid
Useful for accessing and using either the training or validation DataLoader
train = data_loaders.train
valid = data_loaders.valid
Learner
After preparing the data processing pipeline, we can focus on setting up the Model.
The Learner class is used to execute the training and optimization given DataLoaders and an Architecture.
The Learner also encapsulates behaviour around finding an optimal learning rate and running inference on non-training/validation input.
Initializing
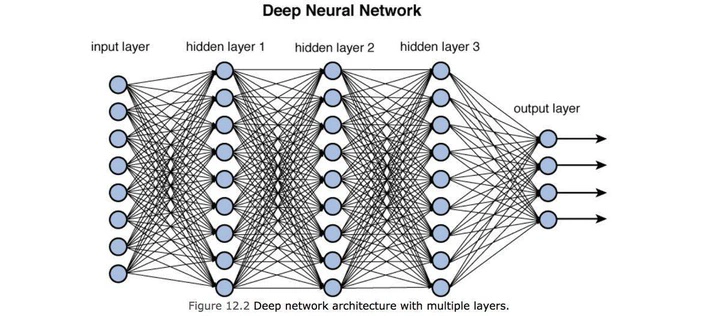
In our example, we have an image recognition problem. There is a utility function that will initialize a Learner object, specifically for image recognition.
learner = vision_learner(data_loaders, resnet18, metrics=accuracy)
vision_learner()will accept ourdata_loadersand an architecture. In this case, we are going to be using theresnet18architecture. The metrics argument accepts a function for displaying and our humand readable metric, in this case, it will be the accuracy of the predictions.
lr_find()
lr_find() is a patched function that is callable by the Learner class.
This will execute the learning rate finder function, training a small batch while gradually finding the optimum learning rate.
The function will display a graph plot with the “valley” indicating the optimum learning rate.
x = learner.lr_find()
x.valley

>>> 0.0012022644514217973
fine_tune()
This method is probably the most useful method when it comes to training the model, especially when requiring transfer learning.
Fine tune will train the model for a certain number of epochs declared by the user and will facilitate in transfer learning if required via the freeze_epochs parameter.
When calling fine_tune with freeze_epochs specified, the Learner will freeze the pretrained layers and train the final layer on the number of freeze_epochs. After, it will unfreeze the pretrained layers
and train all layers for the declared number of epochs.
learner.fine_tune(3, base_lr=0.0012022644514217973, freeze_epochs=1)
fit()
A more simple and straightforward training method. Simply train the model for a certain number of epochs.
learn.fit(10, lr=1e-3)
freeze() and unfreeze()
To have more control over the freezing and unfreezing of pretrained layers, freeze() and unfreeze() can be used alongside fit()
learn.freeze()
learn.fit(1)
learn.unfreeze()
learn.fit(3)
Plot Loss
This function will create a plot graph showing the loss of the training and validation sets. This can be useful because a general rule of thumb, if the validation loss is increasing above the training loss then it could be an indication that the model is overfitting.
learner.recorder.plot_loss()
Confusion Matrix
Another useful plotting function, it will plot a confusion matrix. This will show the training data that deviated from the correct predictions. Useful when needing to sanity check results.
interp = ClassificationInterpretation.from_learner(learner)
interp.plot_confusion_matrix()
Post Training
After training our model using the Learner. We can verify the accuracy our model further by running inference on a test set.
We can resuse the classes we’ve covered e.g. DataBlock but pass in a path to data sets that were not used in training or validation.
test_block = DataBlock(
    blocks=(ImageBlock, CategoryBlock),
    get_items=get_image_files,
    get_y=parent_label,
    item_tfms=Resize(224),
    batch_tfms=Normalize.from_stats(*imagenet_stats)
)

data_set = 'testing'
test_dataloaders = test_block.dataloaders((path/data_set), with_labels=True)
We passed in a different function to batch_tmfs.
Normalize.from_stats(*imagenet_stats) will normalize the testing input around the ImageNet datasets mean and standard deviation values.
This will alow the input data to be normalized closer to the normalized input values used in the pretrained model, leading to higher quality results.
If we remember, we used resnet18 as our Architecture which was trained on the ImageNet dataset.
We can now generate our predictions on the testing set:
predictions, targets = learner.get_preds(dl=test_dataloaders)
And then we view the accuracy:
results = accuracy(predictions, targets)
results
>>> TensorBase(0.9950)
Types of Loss Functions
Using FastAI Learner, the loss function will usually be automatically chosen.
We do have the option of declaring which loss function to use and as a rule of thumb:
Cross Entrophy Loss: usually used in single label classification problemsBinary Cross Entrophy Loss: usually used in multi label classification problemsMean Squared Error Loss: usually used for regression problems
Summary
We went over the basic classes for creating a preprocessing data pipeline and training a moel.